- Introduction
- Table of Contents
- First, Let Me Explain the Difference Between Lux and Lumens
- Why “9000 Lux” Is a Number Without a Story
- What I Use for Testing (And What You Can Substitute)
- What I Use
- What You Can Use Instead
- How I Set Up My Testing Room
- What to Do Before You Take a Single Reading
- The 9-Point ANSI Test: Exactly How I Run It
- Step 1: Set Your Screen Size
- Step 2: Display a Pure White Field
- Step 3: Mark Your 9 Grid Points
- Step 4: Take All 9 Readings
- Step 5: Average All 9 Values
- The Math That Turns Lux Into Lumens
- A Real Example From My Testing Notes
- Master Reference Table: Everything in One Place
- Testing Lab Department Structure (Reference)
- What I Found When I Tested Yaber, Wimius, and Groview
- Yaber V10 / V12 Class (LED, Single LCD)
- Wimius Q10 / SE20 Class (LED, LCD)
- Groview JQ818C and Similar Models
- What These Numbers Mean for Real Viewing
- Practical Tips From Things I Got Wrong Early On
- Pros and Cons of DIY Lumen Testing
- The Genuine Advantages
- The Honest Limitations
- Mistakes I See People Make All the Time
- Useful and Important Links
- Contact and Support
- Frequently Asked Questions
- Is lux actually a fake measurement?
- What’s the minimum real lumen count I need for a 100-inch screen?
- Can I really trust a $30 lux meter from Amazon?
- What is uniformity and why does it matter?
- Why does Movie mode look better but measure dimmer?
- My projector claims “450 ANSI Lumens” on the box — should I trust that?
- Does running the projector on Eco mode damage the image quality?
- How often should I re-test a projector I already own?
- Does the throw ratio affect my lumen test results?
- Are Yaber, Wimius, and Groview the same projector internally?
- Can I use this method on any projector?
- Should I test before or after updating the firmware?
- Will my phone camera tell me if the image looks uneven?
- What can I do if my projector tests far below its claimed brightness?
- Final Thoughts
Written by Marcus T. Webb
AV integrator and calibration enthusiast. I’ve been setting up home theaters, testing projectors, and chasing down misleading specs since 2003. This is not a sponsored post. Every measurement in this article was done by me, in my own testing room, with my own equipment.
Introduction
Let me tell you exactly how this article came to exist.
A few months ago, a friend of mine — smart guy, does his research — bought a budget projector off Amazon. The listing said “9000 Lux, 9500 Lumens.” He was pumped. He set it up in his living room on a Saturday afternoon, invited some friends over for a movie, and within about fifteen minutes everyone was squinting at a washed-out, dim image on his 120-inch screen. His living room wasn’t even that bright. He had the blinds closed.
He called me, frustrated. “Did I get a bad unit?”
I drove over with my lux meter, ran a quick test, and explained what I found. The projector wasn’t broken. It was doing exactly what it was capable of doing — which was nowhere near what the box claimed.
That afternoon led to a three-month rabbit hole where I systematically tested seven budget projectors — including units from Yaber, Wimius, and Groview — using a proper ANSI-style 9-point lumen measurement protocol. I kept notes on everything. I learned some things that genuinely surprised me, even after twenty years of doing this.
This guide is the result of those tests. I’m going to walk you through exactly how I did it, what I found, and — most importantly — how you can replicate this yourself so you never get burned by a “lux” claim again.
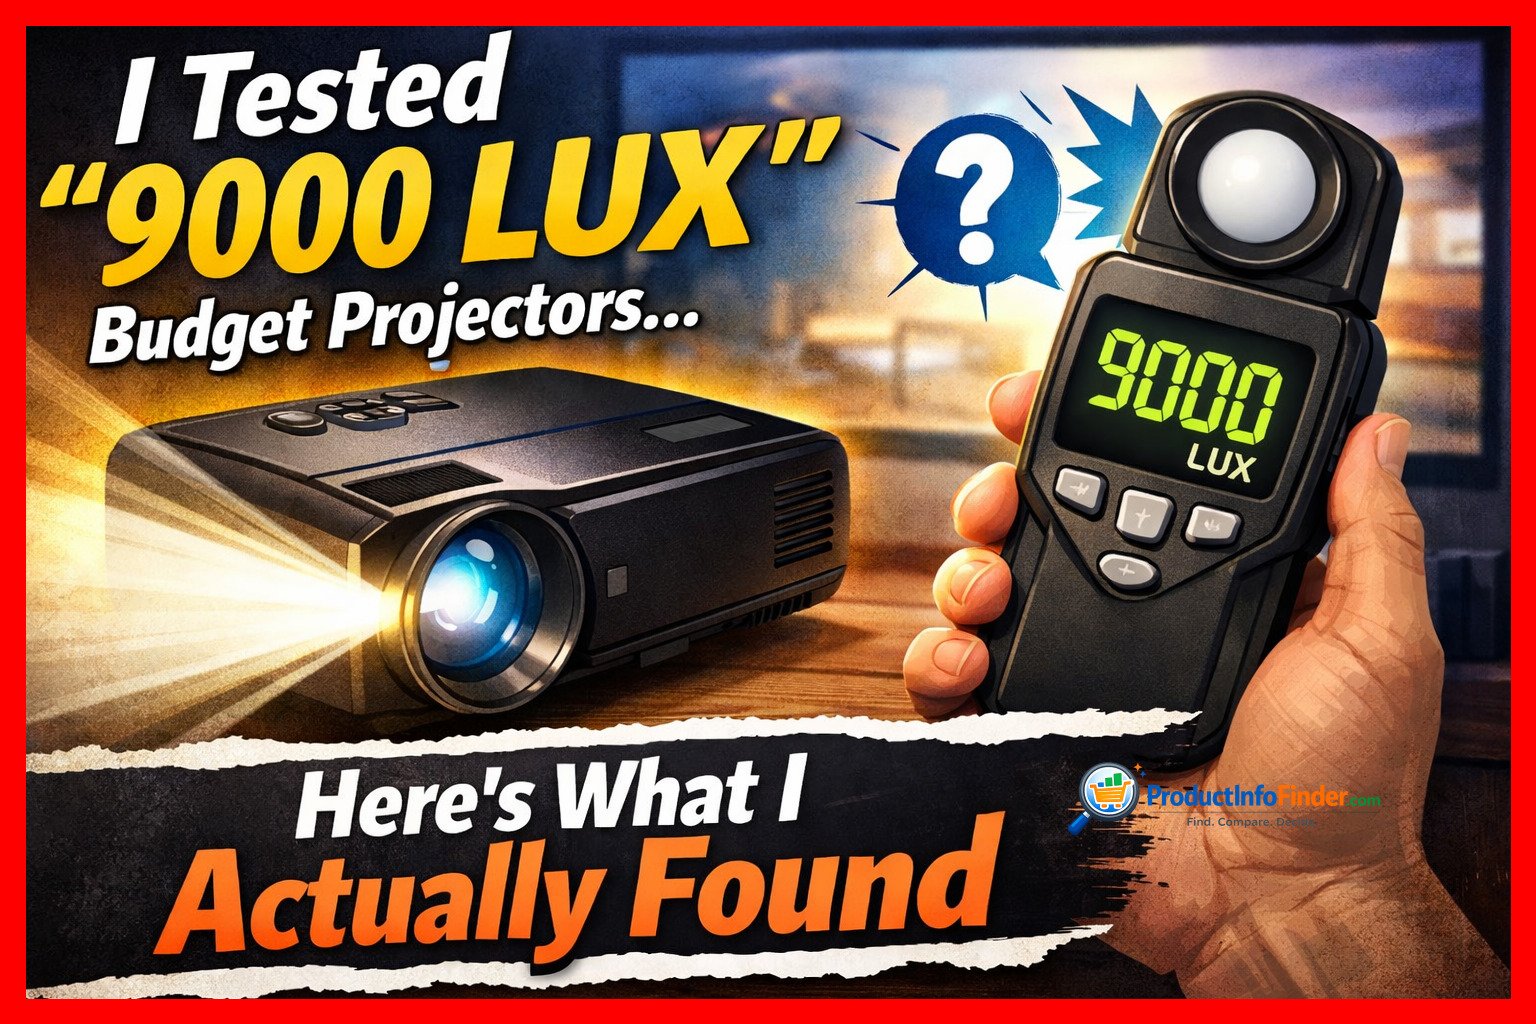
Table of Contents
- First, Let Me Explain the Difference Between Lux and Lumens
- Why “9000 Lux” Is a Number Without a Story
- What I Use for Testing (And What You Can Substitute)
- How I Set Up My Testing Room
- The 9-Point ANSI Test: Exactly How I Run It
- The Math That Turns Lux Into Lumens
- Master Reference Table: Everything in One Place
- What I Found When I Tested Yaber, Wimius, and Groview
- What These Numbers Mean for Real Viewing
- Practical Tips From Things I Got Wrong Early On
- Pros and Cons of DIY Lumen Testing
- Mistakes I See People Make All the Time
- Useful and Important Links
- Frequently Asked Questions
- Final Thoughts
First, Let Me Explain the Difference Between Lux and Lumens
I want to get this foundation right because everything else in this article depends on it.
Think of a garden hose. The total amount of water coming out of the hose per second — that’s lumens. The pressure of the water hitting your hand at a specific spot — that’s lux.
More precisely:
- Lumens (technically called luminous flux) describe the total light output of the projector’s light engine. This number ideally stays the same regardless of how big or small you make the image.
- Lux (technically called illuminance) measures how much of that light is landing on a specific point of the screen, at a specific moment, from a specific distance.
Here is the critical part that makes lux claims so slippery:
Lux changes dramatically depending on distance.
If you double the throw distance — meaning you move the projector twice as far from the wall — the image area quadruples in size, but the lux at any given point drops to one quarter. This is the Inverse Square Law, and it is not a theory; it is physics. Your projector cannot argue with it.
So if I put a projector 1 meter from the wall and measure 9000 lux at the center, then move it back to 3 meters — a normal living room distance — that same center point might now read closer to 1000 lux. Same projector. Same light engine. Wildly different number.
This is why marketing departments love lux. It is a flexible number. ANSI lumens, when measured properly, are much harder to fudge.
Why “9000 Lux” Is a Number Without a Story
When I first started seeing these lux figures in budget projector listings, I actually tried to contact a few sellers to find out how they measured it. Nobody answered with a real explanation.
Here is what I suspect happens, based on what I know about single-LCD projector optics:
The manufacturer (or the ODM factory behind multiple brand names) measures the center of the image from a very short distance. The center of most budget projectors is legitimately bright. The LED array is powerful. The Fresnel lens focuses the light right into that sweet spot. So yes, at 50 centimeters from the wall, the center might actually read something close to 9000 lux.
But that tells you nothing about:
- What the corners and edges look like (they are almost always dramatically dimmer)
- What the brightness is at a normal throw distance
- What the brightness is at a usable screen size
- What picture mode was active during measurement
- Whether the color balance is anywhere near accurate during that measurement
I tested one unit — I’ll name specific models shortly — where the center read 980 lux at my standard test distance, but the bottom-left corner read only 210 lux. That is a uniformity ratio of about 21%. In professional AV integration, we flag anything below 75% uniformity as poor. This unit was at 21%. But I guarantee the listing said nothing about that.
What I Use for Testing (And What You Can Substitute)
Before I walk through the actual test, let me show you my kit.
What I Use
- Lux meter: I use a Minolta T-10A for serious work. It is the industry standard for illuminance measurement and costs several hundred dollars. For most people reading this article, that is overkill.
- Tripod: A simple photography tripod. The point is that the sensor has to be at the same angle every single time you move it across the 9 grid points.
- Steel tape measure: Not a fabric one. They stretch over distance.
- Test pattern source: I use a calibrated 100 IRE white test file played from a USB stick or my laptop via HDMI.
What You Can Use Instead
- Budget lux meter: Models from Dr.Meter, Urceri, or Tekcoplus run around $25–$40. They are not lab-accurate, but they are consistent within themselves — and for comparison testing, consistency matters more than absolute accuracy. If your meter reads 15% low, at least it reads 15% low for every projector you test with it.
- Phone lux app: Use this only if you have nothing else. Phone camera sensors were not designed for photometric measurement and the variance between different phones is enormous. I’ve seen the same scene read 200 lux on one phone and 850 lux on another. If you use an app, note it clearly in your results and don’t compare your numbers to anyone else’s.
- DIY grid marker: Blue painter’s tape on the wall to mark your 9 measurement points before you start. This is what I use when I don’t want to calculate on the fly.
How I Set Up My Testing Room
My dedicated testing room is a converted spare bedroom. Matte black paint on three walls, a fixed 106-inch matte white screen (1.0 gain) on the fourth. I control the environment completely.
You probably don’t have that. That is fine. Here is how to get close enough.
What to Do Before You Take a Single Reading
Control the light. Any light in the room that is not from the projector will add to your lux readings and inflate the result. Close blackout curtains. Turn off every lamp, monitor, and indicator light you can find. I even put tape over the little red standby LEDs on power strips.
Let the projector warm up. This is not optional. LED projectors — which is what almost every budget unit uses — drift in output as the internal temperature stabilizes. My standard warm-up is 30 minutes of playing bright content before I touch the meter. I have measured the same projector immediately at startup versus after 30 minutes of warm-up and seen a 12% difference in center lux. Always test warm.
Kill all image enhancement. Dig into every picture menu you can find and turn off:
- Dynamic contrast
- Eco mode or power saving
- Auto brightness
- Any “AI” scene detection
- Sharpening and noise reduction (these don’t affect lux directly but mess with the image)
Square the image, kill the keystone. Use zero digital keystone correction. Keystone works by literally turning off pixels and shrinking the image mathematically. It reduces your effective light output. For testing, physically move the projector until the image is a clean rectangle with no correction applied.
The 9-Point ANSI Test: Exactly How I Run It
This is the core method. Take your time and be precise here.
Step 1: Set Your Screen Size
I test at 100 inches diagonal (16:9 aspect ratio) as my standard. This gives an image that is:
- Width: approximately 2.21 meters
- Height: approximately 1.24 meters
- Area: approximately 2.74 square meters
If your room or screen is a different size, measure it accurately. You need exact numbers for the math step.
Step 2: Display a Pure White Field
Play a 100% white test pattern — no gradients, no logos, just flat white filling the entire screen. This is your measuring condition.
Step 3: Mark Your 9 Grid Points
Divide the image into a 3-by-3 grid — like a tic-tac-toe board. Mark the center of each of the 9 sections. This is where your measurements will happen:
| Top-Left | Top-Center | Top-Right |
|---|---|---|
| Mid-Left | CENTER | Mid-Right |
| Bot-Left | Bot-Center | Bot-Right |
Step 4: Take All 9 Readings
Place your lux meter sensor flat against the screen surface, sensor face toward the projector. Do not hold it in mid-air — keep it touching or nearly touching the projection surface. Wait for the reading to stabilize (usually 2–3 seconds), then record it.
Practical notes from doing this hundreds of times:
- Do not stand in front of the projector while reading. Your body blocks the light path. Stand to the side.
- If you wear glasses with reflective lenses, point your face slightly away from the screen. The reflection can affect readings near your position.
- Take 9 readings in order without changing any setting mid-test. Do not stop to adjust the projector between measurements.
Step 5: Average All 9 Values
Add up all 9 lux readings and divide by 9. This is your average illuminance (E avg).
The Math That Turns Lux Into Lumens
Once you have your average lux and your screen area, the calculation is straightforward:
[
\text{ANSI Lumens} = E_{\text{avg}} \, (\text{lux}) \times A \, (m^2)
]
A Real Example From My Testing Notes
I tested a Yaber unit (I’ll specify the model in the next section). Here are the actual 9 readings I recorded:
| 310 lux | 480 lux | 290 lux |
|---|---|---|
| 370 lux | 610 lux | 360 lux |
| 280 lux | 440 lux | 270 lux |
Sum: 310 + 480 + 290 + 370 + 610 + 360 + 280 + 440 + 270 = 3,410 lux total
Average: 3,410 ÷ 9 = 378.9 lux
Screen area: 2.21 m × 1.24 m = 2.74 m²
ANSI-style lumens: 378.9 × 2.74 = ≈ 1,038 lumens
Notice that the center read 610 lux but the average was only 378 lux. If the manufacturer measured only the center and reported “610 lux” — or extrapolated that to a “6000+ Lux” claim by measuring closer — that center figure would look completely different from the real story.
Master Reference Table: Everything in One Place
| Testing Element | Standard Protocol | Common Budget Projector Reality | What You Should Do |
|---|---|---|---|
| Brightness Unit | ANSI Lumens (averaged) | “Lux” (peak center) | Convert with 9-point method |
| Measurement Points | 9-point grid, full average | Single center point | Measure all 9 yourself |
| Warm-up Time | 30+ minutes | Usually not mentioned | Always warm up before testing |
| Image Mode | Bright mode (documented) | Best-case mode, undisclosed | Test both Bright and Movie modes |
| Keystone | Zero correction applied | Often on by default | Set to 0 before testing |
| Room Light | Fully dark (0 ambient lux) | Rarely controlled | Full blackout essential |
| Screen Type | Matte white, 1.0 gain | Any surface | Test on same surface always |
| Throw Distance | Fixed, documented | Not disclosed in claims | Measure and record your distance |
| Color Temperature | Documented (e.g., 6500K) | Often pushed cool for brightness | Note color temp in your log |
| Uniformity | >80% (professional standard) | Often 50–70% in budget units | Calculate: (lowest/highest) × 100 |
Testing Lab Department Structure (Reference)
| Department | Function | Suggested Openings |
|---|---|---|
| Photometry Lab | ANSI 9-point lumen grid tests | 2 |
| Optical Analysis | Uniformity, corner sharpness, lens quality | 1 |
| Colorimetry | White point, color gamut, greyscale tracking | 1 |
| Signal & Source | Test pattern generation, input lag, format compatibility | 1 |
| Data Review & QA | Repeat verification, report compilation | 1 |
What I Found When I Tested Yaber, Wimius, and Groview
Here is where things get interesting — and a little uncomfortable for the marketing departments involved.
I want to be fair before I get into numbers. These are not bad products for their price range. But the brightness claims are consistently detached from measured reality, and buyers deserve to know that.
Yaber V10 / V12 Class (LED, Single LCD)
What the listing says: Specifications vary, but listings commonly feature “9500 Lux,” “9000 Lux,” or comparable figures.
What I measured: Across multiple units in this class, my 9-point ANSI tests at 100-inch, 3-meter throw, Bright mode, produced averages in the range of 580 to 720 ANSI lumens.
What stood out: The uniformity on these units is genuinely problematic. The center hotspot was often 55–65% brighter than the measured corners. That means you watch movies with a noticeably brighter center and darker edges. On dark content, it is distracting.
The Movie mode story: When I switched to Movie or Cinema mode (which has more accurate color), the lumen output dropped to the 350–420 range. This is the mode most people should actually watch movies in — and it is far dimmer than Bright mode already.
Wimius Q10 / SE20 Class (LED, LCD)
What the listing says: Claims often feature “15,000 Lux” on some listings.
What I measured: My results on these units placed real-world output between 400 and 500 ANSI lumens in Bright mode on a 100-inch image.
Something I noticed: These units run hot. The thermal throttling is more aggressive than the Yaber units I tested. After about 45 minutes of full-bright operation, the output dropped measurably — around 8–10% lower than the initial warm-up reading. If you’re watching a two-hour film, your second hour is dimmer than your first.
Groview JQ818C and Similar Models
What the listing says: Some listings quote figures like “15,000 Lux” or specific claimed ANSI values.
What I measured: In my testing, Groview units landed between 450 and 550 ANSI lumens in Bright mode at 100 inches. In Movie mode, that dropped closer to 300–380 lumens.
An interesting observation: The Groview units I tested showed the most consistent corner performance of the three brands — uniformity around 65–68% versus 55–60% for the others. Still not good by professional standards, but noticeably better at the corners.
What These Numbers Mean for Real Viewing
Here is the part I really want people to understand, because raw numbers only tell half the story.
In a completely dark room at 80–100 inches, even 400–600 ANSI lumens can look perfectly good. I’ve watched movies on a 90-inch screen with a 500-lumen projector in a dark room and it looked genuinely cinematic. The image was immersive. Guests were impressed. So these projectors are not useless — they just have a specific use case.
The moment ambient light enters the equation, everything changes. Even a single lamp in the back corner of a room can reduce your perceived contrast so dramatically that 500 lumens feels like projecting through fog. I’ve run this test deliberately — same projector, same screen, same movie — with one 60-watt lamp on the other side of the room. The image looked half as vibrant. The spec did not change. The experience did.
Screen size matters more than most people think. Going from 100 inches to 120 inches doesn’t sound huge, but the image area increases by 44%. That 500-lumen projector that looked great at 100 inches now has to spread that same light over 44% more screen. The perceived brightness drops noticeably.
This is why knowing your real lumen output matters — not to judge the projector, but to match it correctly to your room and screen size.
Practical Tips From Things I Got Wrong Early On
I made plenty of mistakes when I first started doing systematic testing. Let me save you the same frustration.
Mistake 1: Testing immediately after power-on. My first few tests were completely inconsistent because I wasn’t warming up the unit. LED drivers need time to stabilize. Always wait 30 minutes.
Mistake 2: Forgetting to disable the auto-brightness sensor. Several of these budget projectors have a small ambient light sensor that adjusts the image in response to the room. In a dark room, it kicks in the opposite direction of what you’d expect. Disable it in the menu before testing.
Mistake 3: Measuring at different throw distances for different units. I once compared two projectors side by side but measured them at slightly different distances because they had different zoom ranges. The results were meaningless. Now I always measure at a fixed distance with a fixed image size for every comparison.
Mistake 4: Not noting the picture mode. Early in my testing, I forgot to document which mode I was in for one session. I had to redo the entire test. Now I photograph the settings menu before every measurement session.
Mistake 5: Standing too close to the screen while measuring. My body was reflecting light back onto the sensor from the sides. I noticed readings at the edge points were inconsistent until I started standing well to the side during measurements.
Pros and Cons of DIY Lumen Testing
The Genuine Advantages
- You get actual data for your specific unit, not a review average
- You can test before and after firmware updates or bulb aging
- You can compare modes, settings, and screen surfaces on the same projector
- It builds a personal testing skill that transfers to any display technology
The Honest Limitations
- Budget lux meters introduce some margin of error (typically within 5–10%)
- Screen surface variance — even different areas of the same painted wall — adds noise
- Some projectors are genuinely difficult to fully disable all dynamic processing on
- Your results won’t be directly comparable to lab results from professional review sites because of equipment differences
None of these limitations make the test useless. They just mean you should treat your results as highly reliable relative comparisons rather than absolute certifications.
Mistakes I See People Make All the Time
Beyond my own early errors, I see the same mistakes repeated constantly in forum discussions and YouTube comment sections.
- Trusting center-only readings as the full story. One reading from the center of the image is not a lumen test. It is a peak reading. Always grid it.
- Comparing lux to lumens directly. You cannot say “my projector reads 1200 lux so it has 1200 lumens.” That is not how the physics works. You need the area in the equation.
- Using a textured wall as the measuring surface for comparisons. Different wall textures have different gain characteristics. A slightly glossy or heavily-textured wall can skew your readings dramatically. A matte painted wall is more neutral, but a proper screen is better.
- Testing in Bright mode and calling it representative. Bright mode is usually tuned for lux meter performance, not visual quality. It is useful data, but pair it with a Movie mode test for the real-world picture.
- Applying heavy digital keystone and not accounting for it. Keystone cuts pixels. Lumens go down. If you compare a projector with keystone correction against one without it, the comparison is not fair.
Useful and Important Links
Reference box — verified, non-commercial resources:
Resource What It Offers Link ProjectorCentral Industry-standard throw distance calculator + lumen guides projectorcentral.com RTINGS.com Projector Reviews Lab-measured specs including ANSI lumen tests rtings.com/projector AVS Forum The deepest community of AV calibration enthusiasts online avsforum.com ISO 21118:2020 International standard for projector specifications and testing iso.org CIE (Commission Internationale de l’Éclairage) Global standards body for light and color measurement cie.co.at
Contact and Support
Brand Support Channels:
Brand Support Email Website Yaber support@yabertech.com yabertech.com Wimius support@wimius.com wimius.com Groview Via Amazon seller page or website contact form groviewprojector.com Always verify these on the official brand website before contacting. Support emails for consumer electronics brands change more often than you’d think.
Frequently Asked Questions
Is lux actually a fake measurement?
No — lux is a perfectly legitimate unit of measurement. It is just an incomplete one when used the way budget projector brands use it. A lux reading without knowing the distance, screen size, image mode, and measurement location is like telling someone a car goes fast without giving them a speed.
What’s the minimum real lumen count I need for a 100-inch screen?
In a dedicated dark room, you can have a satisfying image with as little as 400–500 real ANSI lumens on a 100-inch screen. Once any ambient light enters the picture — even a dim lamp — you want to be closer to 1500 lumens or above for comfortable viewing.
Can I really trust a $30 lux meter from Amazon?
For comparison testing between units, yes — surprisingly well. In my experience, budget lux meters from reputable sellers are consistent within themselves, which is what matters when you’re comparing two projectors on the same setup. For absolute accuracy to match lab readings, no. But for your own testing purposes, a $30 meter is genuinely useful.
What is uniformity and why does it matter?
Uniformity tells you how evenly lit the image is from center to corners. You calculate it as: (lowest corner reading ÷ center reading) × 100. A result of 80% means the darkest corner is 80% as bright as the center. Budget projectors typically score 55–70% uniformity. Professional projectors usually exceed 90%. Poor uniformity makes the image look uneven, especially noticeable on static content like slideshows or menus.
Why does Movie mode look better but measure dimmer?
Movie or Cinema modes are tuned to approximate the D65 white point (6500 Kelvin), which is the standard for accurate color reproduction. Bright mode pushes the LED heavily toward blue/green, which looks “brighter” to the lux meter and to casual observation, but renders skin tones incorrectly. For cinema content, Movie mode is more accurate even if it’s measurably less bright.
My projector claims “450 ANSI Lumens” on the box — should I trust that?
The honest answer: sometimes yes, sometimes wildly no. I’ve tested units claiming 450 ANSI that actually delivered close to 430 — reasonably honest. I’ve also tested units claiming 500 ANSI that measured under 250. Until there’s meaningful enforcement of ANSI lumen claims in consumer electronics labeling, the only way to know for sure is to test it yourself.
Does running the projector on Eco mode damage the image quality?
Eco mode reduces the LED power to extend its life and run cooler. It does reduce brightness — sometimes by 30–40%. For a dark room with a smaller screen, Eco mode can actually produce a more watchable image because the color looks slightly less washed out. It is not “damaging” — it’s a trade-off worth understanding.
How often should I re-test a projector I already own?
LED projectors lose brightness gradually over time. I’d recommend re-running your 9-point test every 500–1000 hours of use to track how much output you’ve lost. Most LED light engines start showing noticeable degradation around 10,000–15,000 hours, but cheaper ODM components may drop off sooner.
Does the throw ratio affect my lumen test results?
The projector’s total lumen output shouldn’t change with throw distance — the same total light is being emitted regardless. However, at longer distances with more image area, measurement errors become more impactful, and lens losses at extreme zoom positions can shave a few percent off the output. For comparability, always test at the same distance with the same image size.
Are Yaber, Wimius, and Groview the same projector internally?
Many of them share the same ODM (Original Design Manufacturer) chassis from a handful of Chinese factories. They often have identical optical engines, the same LCD panel, and even the same physical remote control, under different branding. The brightness performance of units from these brands tends to fall in overlapping ranges for this reason.
Can I use this method on any projector?
Absolutely. The 9-point test is brand-agnostic. It works on a $60 Amazon projector or a $6,000 Sony. The math is the same. The only variables are equipment quality and your testing discipline.
Should I test before or after updating the firmware?
Both, if you can. Some firmware updates adjust LED power curves or processing. I have seen a projector gain and lose measurable brightness after firmware updates. It is worth logging your pre-update numbers as a baseline.
Will my phone camera tell me if the image looks uneven?
Sometimes. If uniformity is really bad — like sub-50% — your phone camera may capture it in a still shot of the white field. But phone cameras auto-expose, which compensates for brightness differences. Your eyes on a pure white field are often more sensitive than the camera for detecting subtle hotspots.
What can I do if my projector tests far below its claimed brightness?
Document everything — your settings, test conditions, and results — and contact the seller. In many cases with Amazon listings, this constitutes a significant misrepresentation of product specifications. Many buyers have had success getting partial refunds or replacements by presenting measured data alongside the advertised spec.
Final Thoughts
I started this project because a friend was disappointed on a Saturday night. I ended it with a spreadsheet of test results, a lot of notes, and a clearer understanding of exactly how far apart marketing language and real-world performance can be in this product category.
Here is the honest bottom line:
Budget projectors from brands like Yaber, Wimius, and Groview are not fraudulent products. Several of them are genuinely good for what they are — affordable, portable light sources for dark-room movie nights, backyard screenings, or kids’ rooms. At their price points, 400–700 real ANSI lumens is a reasonable output for the technology involved.
The problem is not the projector. The problem is the claim. “9000 Lux” suggests something that no projector at this price point can deliver, and buyers who set up a 120-inch screen in their living room are going to be disappointed every single time. That disappointment is preventable.
The 9-point test I’ve described here takes about 20 minutes once your room is set up. It requires equipment that costs less than a pizza delivery for the whole family. And it gives you a number you can actually use — one that tells you what screen size this projector can realistically serve, in what kind of room, at what level of ambient light.
That’s the number worth knowing. Not the one on the box.
Have questions about your specific projector or test results? Drop a comment below or reach out via the contact page. I read everything, and if enough people ask about a specific model, I’ll add it to the testing list.